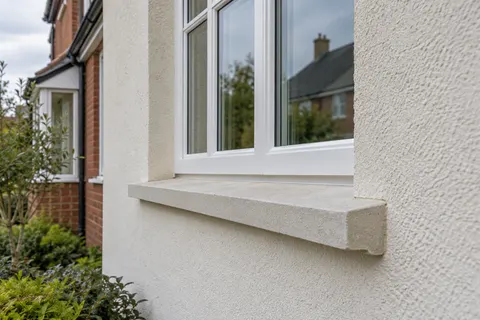
Exterior rendering
Render Repairs Nottingham | Cracks, Loose Areas and Edges
A useful repair proposal starts with a description of the defect, not a promise to make every mark disappear. Cracking, detached material, staining and damage around a fitting can need different investigations. Record what has changed, identify the affected area and establish whether the problem is confined to the render before choosing the repair.

On this page
Give each defect a location and a history
Take photographs from safe ground level, including a wider view that shows where the defect sits on the building. Label the elevation and note when the mark first appeared. If a previous repair has opened again, include any date, material reference or photograph you have. That history can be useful when the assessor decides whether a local patch is appropriate or whether another part of the wall needs investigation.
Avoid assigning a cause from appearance alone. A crack beneath a window may have several explanations, and a dark patch does not establish that render is loose. Describe what you can observe: length, location, recurrence, nearby pipework and whether the area changes after rain. Do not tap, pull or climb to test suspect material yourself. Where loose material could fall, keep people clear and obtain an appropriate site assessment.
- Map the damage Tapping finds hollow areas; cracks and their likely cause are noted.
- Cut back Failed render is cut out to a sound edge, usually squared off.
- Fix the cause Leaking gutters, sills without drips or render below the DPC are dealt with.
- Rebuild in coats Using a material compatible with the surrounding render and masonry.
- Blend the finish Texture is matched; colour may need a coating over the wider area.
The usual order of work. The survey and the chosen products decide the actual steps.
Find the boundary of sound material
The visible defect may be smaller than the area that needs attention. The contractor should explain how the condition will be assessed and how the proposed repair boundary is determined. A neat rectangle chosen only for appearance may not correspond to the sound background. Conversely, a limited defect does not automatically justify replacing every elevation. Ask for the evidence supporting the recommended extent.
Access can affect that assessment. If only the lower wall has been inspected, the quotation should not imply that an upper gable has already been checked in detail. Identify any further survey required once suitable access is available. The result may confirm the original scope or require a documented change. Keeping those stages distinct helps avoid a repair contract that relies on assumptions nobody remembers making.
Resolve causes that sit outside the patch
Where a defect is associated with repeated wetting, a window alteration or another building change, the relevant component may need attention before the render is closed up. The repair scope should identify that dependency and who will deal with it. A fresh surface over an unresolved interface can leave the owner facing the same concern again without understanding why.
Rainwater fittings are a practical example. A stained area below a downpipe joint should prompt inspection of the fitting and wall, rather than an immediate coating recommendation. This is not a diagnosis of every stain. It is a reason to investigate the observed relationship. If a separate trade must make an alteration, agree the sequence and record completion before the render repair proceeds.
| Observation | Useful accompanying information |
|---|---|
| A crack has returned | Earlier repair date and photographs |
| A patch sounds or appears loose | Location and any previous assessment |
| Dark marking below a fitting | Rainwater observations and fitting condition |
| Damage after window work | Installation date and disturbed area |
| A different-looking patch | Known product and colour references |
Choose repair materials with the existing wall in mind
A patch needs a compatible approach to the material it meets and the background it covers. Ask what is known about the existing render and how any uncertainty will be resolved. The most familiar modern product is not automatically suitable for an older lime surface. The lime rendering guide explains the importance of identifying traditional fabric before selecting a replacement.
Where the existing system is known, retain its product references and any installation records. Where it is not, samples and investigation may be needed. The contractor should explain how the patch edges, finish texture and colour will be handled. A repair proposal is more useful when it distinguishes technical suitability from the separate question of how closely the finished area will resemble the surrounding surface.
Be realistic about matching
Even a correctly specified repair can remain visible because the surrounding wall has weathered or the original texture cannot be reproduced exactly. Ask for a sample where appearance is important and agree the normal viewing conditions for judging it. Avoid relying on a promise of an invisible result without seeing what is proposed. The position of a repair can matter as much as its size: a patch beside a natural break may be less conspicuous than one in the centre of a broad face.
If a uniform colour is the objective, render colour change may be considered after suitable repairs and assessment. It is a separate treatment, not evidence that an unstable background has become sound. In some cases, treating a complete defined section gives a more coherent appearance than repeatedly extending small patches. Compare the options with their preparation and boundaries clearly stated.
Keep the final record usable
At handover, photograph the repaired locations and note the materials and any related work undertaken. Retain the original defect photographs as well. If the same area changes later, that record is more helpful than a general note saying the house was repaired. Ask what signs should prompt further inspection and what routine care is appropriate for the installed finish.
For several repairs across a building, use a simple numbered schedule so nothing is lost between the survey and final inspection. Mark completed items and any agreed exclusions. If the survey instead leads to replacement of a whole face, the wall rendering page helps define the new scope. A repair assessment can legitimately change direction, but the owner should be able to see the evidence and approve the resulting work description.
Common questions
Can a photograph confirm a crack is harmless?
No. It can locate and describe the issue, but an appropriate assessment is needed before deciding its cause or treatment.
Will a small repair always be cheaper than a new wall finish?
Area alone is not enough to compare the work. Access, investigation, matching and background condition all affect the scope. Compare the access and preparation allowances, the agreed patch boundary and any wider finishing needed to achieve the chosen appearance before deciding between the two.
Can a coating hold loose render in place?
Do not treat a decorative coating as a repair for detached material. The background must first be assessed and made suitable for the specified treatment.
What if the old product cannot be identified?
Record that limitation and ask what investigation or sample work is needed. Do not substitute a product solely because its colour appears similar.
See housing and planning information for Nottingham and nearby places, including the source and geography behind each figure.