Exterior rendering
Pebbledash Removal Nottingham | Assess, Remove and Re-render
Removing pebbledash is only part of the decision. The wall will need an agreed outcome afterwards, and the condition of the concealed background may affect what is possible. Start with the reason for removal, identify the proposed replacement and allow the investigation to test assumptions before the whole surface is disturbed.

On this page
Explain the result you want after removal
Some homeowners dislike the texture but are satisfied with the condition of the wall. Others have cracking or loose areas and need a repair strategy. A third group hopes to reveal brickwork. These are different briefs. Describe the desired result before asking for a removal price, because the replacement finish and background work can be a substantial part of the eventual project. A quotation for stripping alone should not be confused with a finished exterior.
If exposed masonry is the objective, ask how its suitability will be assessed and who would carry out any necessary restoration. Hidden brickwork may include repairs, damaged faces or material that was never intended to remain exposed. A removal trial can reveal some of that condition, but it cannot guarantee an attractive brick finish across every elevation. Keep re-rendering as a separately specified outcome rather than an unpriced fallback.
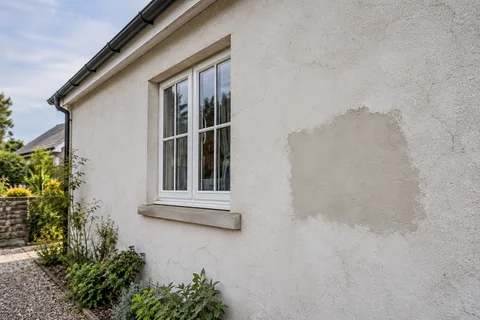
- Trial area A small patch is taken off to see how well the dash is bonded and what lies beneath.
- Removal Dash and backing render are hacked off to masonry or to a sound backing coat.
- Clear and dispose Debris is bagged or skipped; this is heavy, dusty and noisy work.
- Repair the masonry Exposed bricks, blocks and joints are repaired before anything new goes on.
- New render system The wall is rendered with the chosen system, or left as fair-faced masonry if suitable.
The usual order of work. The survey and the chosen products decide the actual steps.
Use a trial to make a decision
Choose a trial location that helps answer a real question about the wall. The contractor should explain what the trial is testing, how the area will be protected and what happens after it is opened. Record the exposed materials and any damage caused by removal. The result may support the proposed method, suggest a different approach or show that more investigation is needed before the scope can be fixed.
A trial is not a licence to continue across the whole façade without discussion. Agree who will review the findings and how any changed work will be authorised. If several elevations have different ages or coatings, one test may not represent all of them. Identify those differences in advance so the investigation is proportionate to the uncertainty, rather than driven by whichever corner is easiest to reach.
Separate loose covering from sound retained material
The condition survey should identify areas that are detached, cracked, previously repaired or apparently sound. That information helps distinguish a local repair from wholesale removal. A broad description such as “old pebbledash” does not establish the adhesion or suitability of every section. Where the contractor recommends retaining part of the covering, ask how the selected subsequent treatment will work with it.
Where removal is necessary, define how far it extends at corners, openings and the base. Partial removal needs a coherent junction with retained work. It can be difficult to make a new area look identical to an old textured finish, so discuss appearance openly. The render repair guide is relevant where the principal problem is local failure. The colour-change guide is relevant only where the assessed background is suitable for that type of treatment.
| Objective | Question that must be answered |
|---|---|
| Replace a failing finish | What caused the failure and how much is affected? |
| Change the appearance | Can the existing background remain in a suitable system? |
| Expose brickwork | Is the concealed masonry suitable for that outcome? |
Plan dust, debris and access before opening the wall
Removal changes the practical demands of a project. Discuss how the working area will be separated from residents or other users, how nearby surfaces will be protected and how debris will be handled. The contractor’s method and access arrangement should be suitable for the actual task. A narrow path, glazed roof or shared entrance can make this planning more involved than the apparent area of pebbledash suggests.
Explain where a vehicle can stop, whether waste has to pass through a restricted route and which parts of the property must remain accessible. Do not assume that a large pile of removed material can simply wait beside the wall until the end. Waste handling, protection and reinstatement should appear in the scope so the property is left usable as well as visually improved. Specialist hazards or uncertain materials require appropriate assessment before disturbance.
Specify the wall that will replace it
Once the background condition is understood, the replacement system can be described properly. Record any masonry repairs, levelling or other preparation required before the new render. Silicone rendering and monocouche rendering offer different finishes and system arrangements; neither should be selected merely because it is the next product in a contractor’s usual sequence. Traditional fabric may need a different approach, assessed on its own merits.
Include the details affected by the change in thickness or finish. Sills, returns, pipes and ground-level terminations may need adjustment. If windows or roof-edge work are planned, coordinate them now. It is wasteful to complete a new face and then cut into it for a previously known alteration. Mark the intended stopping points and agree physical samples before the decorative stage begins.
Keep uncertainty visible in the quotation
A proposal can distinguish the work that is known from provisional background repairs. Ask how those allowances will be measured or agreed and what evidence will be provided if the scope changes. That approach is more useful than a confident fixed description built on unseen masonry. It also gives you a way to compare quotations that have made different assumptions about the same wall.
At completion, retain the investigation photographs, final scope and installed finish references. They explain why the replacement was chosen and what was done beneath it. Check that any agreed reinstatement, such as pipe brackets or external lights, has been completed. Inspect the wall perimeter and protected areas as well as the central render surface. Removal work should end with the agreed finished result, not simply the absence of the old texture.
Common questions
Can removal damage the bricks?
Yes, depending on the covering, bond, masonry and method. A controlled trial and competent assessment help establish the risk before wider work.
Is re-rendering always required afterwards?
The appropriate outcome depends on the wall. Exposed masonry should not be promised before its condition and suitability are established.
Can just one elevation be stripped?
It can be considered, but the retained edges and replacement finish need a clear detail. The other elevations should still be assessed where their condition is relevant.
What if hidden repairs are found?
Pause at the agreed review point, document the findings and resolve the revised preparation and cost implications before proceeding beyond the authorised scope.
See housing and planning information for Nottingham and nearby places, including the source and geography behind each figure.