Exterior rendering
Silicone Rendering Nottingham | Systems, Texture and Colour
Silicone rendering is usually discussed as a finish, but the quotation should describe the system supporting it. The background, preparation, base coat and any specified reinforcement all influence the result. Comparing two coloured topcoats without those details leaves much of the proposed work unexplained.

On this page
Ask what sits below the decorative layer
The term silicone render is sometimes used loosely in early conversations. Ask for the proposed manufacturer and system, the type of background it is intended for and the layers included. A quotation that identifies only a tub colour or texture is incomplete as a description of the wall treatment. The installer should be able to explain how the selected finish relates to the substrate and the work required before the decorative stage.
If the existing wall is uneven, painted or patched, record those conditions rather than assuming the final coating will conceal them. Preparation may involve retaining a suitable existing surface, making repairs or removing material that is not fit to remain. The contractor’s recommendation should be tied to the assessment. Photographs can help locate defects, but they cannot demonstrate the adhesion of every layer under a proposed new finish.
- Sound background A background accepted by the specified system. Keeping old render requires a system-specific assessment of its bond and condition.
- Beads Corner, stop and base beads set the edges and straight lines.
- Basecoat with mesh Glass-fibre mesh embedded in the basecoat resists cracking.
- Primer Where the system requires it, tinted towards the finish colour.
- Silicone finish A thin, through-coloured, water-repellent coat that forms the texture.
Wall on the left, finish on the right. Not to scale: coats, thicknesses and primers follow the chosen manufacturer’s system and the condition of the wall.
Use the texture sample to answer a specific question
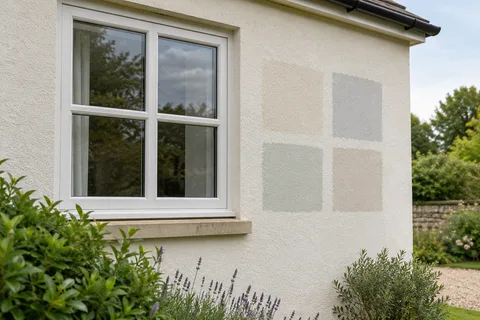
A sample is most useful when it represents the product and texture being proposed, rather than a broadly similar finish. Ask how it was prepared and whether its appearance is representative of the chosen application. Put it beside the actual window frame, brickwork and roof material where practical. View it from a normal distance as well as close up. Tiny differences that seem important in your hand can become less obvious across a complete elevation.
Conversely, a strong colour may appear more dominant when repeated over a large area. Test it on the elevation that receives the most light and on a shaded face. Do not rely on a screen image for the final choice, since devices and photographs alter colour. Record the accepted product, colour and texture together so that a later order or variation does not silently change one part of the selection.
Match the system to the proposed extent
For new masonry, the wall must be ready for the specified preparation and finish. For refurbishment, the retained layers must be suitable for the proposed treatment. These are different starting points even if the finished surfaces will look alike. Ask the quotation to separate new work, retained backgrounds and repaired areas. That makes it easier to understand why one elevation may require a different preparation sequence from another.
Where the plan is mainly a colour refresh, render colour change may be the more relevant discussion. Where insulation is part of the project, the decorative silicone finish belongs within a complete external wall insulation specification. Keep those scopes distinct. Neither a fresh colour nor the word silicone establishes that failing render has been repaired or that thermal improvement has been designed.
| Question | Useful answer |
|---|---|
| What is the background? | Identified masonry or existing suitable system |
| What preparation is included? | Specific treatment for each condition |
| Which finish? | Manufacturer, product, texture and colour |
| How are interfaces handled? | Defined openings, terminations and movement details |
| What records remain? | Installed references and care guidance |
Keep the water-shedding details in view
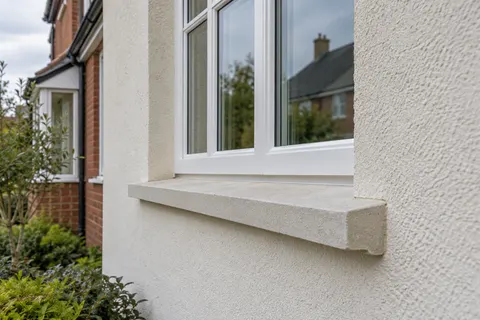
A coloured surface is only one part of how the elevation handles weather. Sills, roof edges, pipework and the base of the finish deserve attention in the same specification. Record concentrated staining below a gutter or beside a downpipe before discussing a cosmetic treatment. The visible mark may require investigation of another component; changing the finish alone does not explain the source of repeated wetting.
New windows or moved pipes can alter these interfaces. Agree the final arrangement before the decorative coat is applied. Where a fixture must be attached later, retain the relevant system details and establish a suitable fixing approach. Avoid treating a completed façade as an interchangeable surface into which any fitting can be installed without checking what lies beneath it.
Allow the programme to follow the product requirements
The contractor should plan application and protection around the selected products and actual conditions. Ask how deliveries, preparation, intermediate stages and final coating will be sequenced across the elevations. A date for “rendering” may cover several different operations, and not every day between them involves visible activity. Understanding the sequence helps residents know when access or use of windows will be affected.
Discuss stopping points before work begins, particularly where a large face cannot be completed as one planned operation. The programme should allow the installer to work within the system requirements rather than force an unsuitable finish stage to meet an unrelated booking. If conditions cause a change, ask which stage is affected and what protection or rescheduling is needed. That is more useful than a generic promise that weather will not matter.
Judge the result against the agreed specification
Inspect the finish from normal viewing positions and compare it with the accepted texture and colour sample. Review the perimeter, returns and reinstated fittings as well as the broad surface. Record any concern with a photograph and location so it can be discussed precisely. A product reference, an agreed sample and a written extent provide a practical basis for that conversation.
Keep the manufacturer’s care information with the installation record. Do not assume every cleaner, coating or repair material is compatible with every silicone finish. If maintenance is needed later, identify the installed system first and test any proposed treatment as advised. The monocouche rendering guide is also useful when comparing an alternative mineral appearance before the original decision is made, rather than after a colour has already been ordered.
Common questions
Is silicone render a paint?
A silicone render finish and a decorative paint are different products. Ask for the exact specification so a colour-change proposal is not confused with a new render system.
Can it go straight over old pebbledash?
Do not assume that. The existing covering and proposed system need assessment, including whether retention is suitable and what preparation is required.
Does it mean the wall will never need cleaning?
No. Future care depends on the installed product and the building’s conditions. Use the manufacturer’s maintenance advice rather than an unsupported maintenance-free claim.
Can the same finish be used on an extension and the house?
Possibly, but the backgrounds and junction need to be addressed. Matching colour is only one part of making the two areas work together.
See housing and planning information for Nottingham and nearby places, including the source and geography behind each figure.