Exterior rendering
Wall Rendering Nottingham | Individual Elevations
One wall can be a sensible project in its own right. The important work often sits at its edges: the return into another finish, the top below the roof, the base above the ground and the openings within it. A wall-specific quotation should explain those boundaries as carefully as the main area.

On this page
Mark the exact face and its returns
Identify the wall on a photograph or simple sketch and mark where the proposed finish stops. Include the narrow returns beside doors, the inside of a recessed entrance and any section hidden behind a pipe. State whether the neighbouring elevation will be retained untouched. Without that definition, two quotations can describe very different amounts of work while both appear to cover “the side wall”. Dimensions help, but a clear boundary is the first requirement.
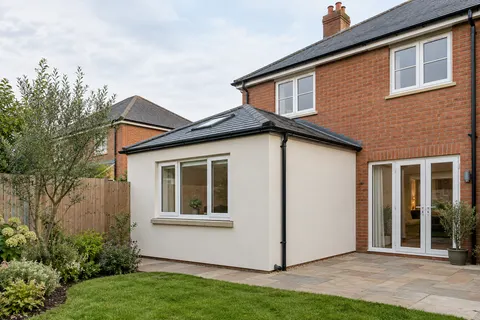
Consider the view around the corner. A replacement finish may look reasonable straight on and awkward where it meets an older textured surface. A deliberate stopping detail can be preferable to an attempted invisible blend that was never realistic. Ask where any trim, joint or change of plane will sit, and how it will relate to window lines or existing features. The wall should have a resolved perimeter before its central area is measured.
- Set the edges Decide where new render stops against brick, stone or an existing finish.
- Prepare the background Remove loose material, repair masonry and prepare suction and surface key. Existing paint needs a specified removal or alternative treatment.
- Base coat Built up to level the wall, with mesh where backgrounds change or crack.
- Finish Matched to the rest of the house or chosen as a deliberate contrast.
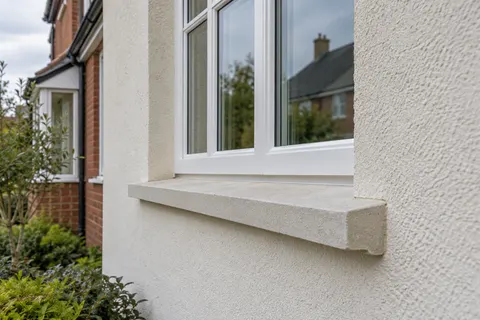
- Shed the water Copings, sills and the base bead keep rain off the top and away from the bottom edge.
The usual order of work. The survey and the chosen products decide the actual steps.
Find out what is attached to the background
Look beyond the visible coating. The survey needs to identify whether the wall is bare masonry, previously rendered, painted, patched or formed from more than one background. It should distinguish loose material from sound material that is being retained. A new finish is not a way of avoiding uncertainty about the wall beneath it. Where access limits the first inspection, the quotation should say what will be checked once access is available.
Cracks need location and history, not a diagnosis based on one photograph. Record when you first noticed them, whether earlier repairs have reopened and whether other changes occurred nearby. The contractor may need further assessment before specifying a repair. Render repair can address a defined defect, whereas a new finish across the wall is a different scope. The distinction should remain clear even if both appear in the same proposal.
Work through openings and fixtures
Count windows, doors, vents, cables, lights, meter boxes and downpipes before the specification is finalised. Each interrupts the wall surface and may need a defined treatment. State which fixtures will be removed temporarily, which will stay in place and who is responsible for specialist disconnection. Render should not leave a service inaccessible or bury a functioning opening because it falls inside the finished area.
The depth of sills and position of frames can limit the build-up available. If the proposal adds insulation, those dimensions become part of the design rather than a cosmetic afterthought. The external wall insulation page explains why the complete edge arrangement matters. For a render-only job, the final finish still needs a clear relationship with sills, frames and the lower termination. Request a detail for any junction that cannot be explained easily on site.
| Feature | Record before quoting |
|---|---|
| Opening | Frame position, sill and existing reveal finish |
| Rainwater pipe | Bracket positions and removal responsibility |
| Vent | Function and required clear opening |
| Corner | Retained material on adjoining face |
| Base | Ground level and proposed finish termination |
Choose a finish that suits the wall and its setting
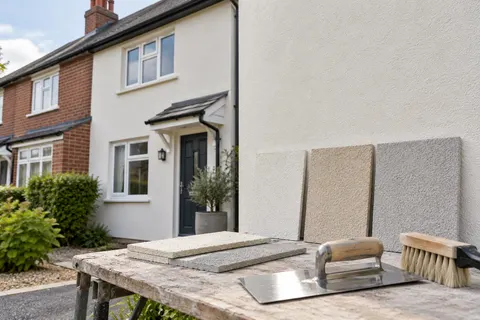
A large uninterrupted gable and a small entrance wall present different visual conditions. Texture, colour and the position of stopping details can make an otherwise simple specification look considered. View a sample beside the material you are retaining. A photograph of another property may help explain the style you like, but it cannot demonstrate the exact result on your wall or establish compatibility with its background.
The material choice follows the construction and specification. A thin-coat silicone system, a mineral monocouche finish or an appropriate lime approach should not be selected solely by which sample looks smoothest. Lime rendering deserves particular consideration where traditional fabric is involved, but age alone does not provide a complete specification. Establish the existing materials and their condition before deciding what should replace them.
Allow enough room to work on a small project
A modest wall area does not guarantee simple access. A wall beside a conservatory, above a pitched roof or close to a boundary may require an arrangement that is more involved than its size suggests. Tell the contractor about neighbouring land, shared access and any structure beneath the work. The access plan must suit the task and loads; it should not be selected from the finished area alone.
Protection also extends beyond the wall. Discuss nearby glazing, paving, plants, parked vehicles and routes used by other people. Ask where materials will be mixed or stored and where waste will leave the property. These are practical quotation items, not extras to discover after a start date has been agreed. For an occupied building, establish how doors and gates will be used while work is under way.
Inspect the joins as well as the flat surface
At completion, walk around the wall so you can see returns and edges from normal viewing positions. Compare the extent with the marked photograph, look at the agreed sample and identify any fixtures still waiting to be reinstated. Check that vents and access covers remain usable. Raise specific locations rather than describing the entire finish as satisfactory or unsatisfactory without explaining why.
Retain the product reference, colour and photographs of concealed preparation where these have been provided. If another elevation is tackled later, those records are more useful than trying to identify the system by sight. A later extension or window change may still require a new compatibility assessment, but knowing what was installed gives that discussion a better starting point. Keep any agreed maintenance guidance with the same record.
Common questions
Can a single wall be a different colour?
Yes, as an intentional design choice where the required permissions and material specification allow it. Review how the colour ends at corners and meets retained finishes.
Will a new wall finish hide an old repair?
It may create a more consistent appearance, but it does not remove the need to assess why the repair was made or whether the background is suitable.
Are garden walls treated in the same way?
No automatic assumption should be made. A freestanding wall has different tops, faces and ground relationships from a house elevation and needs its own assessment.
Should pipes be taken off first?
The scope should say which can be removed, by whom, and how they will be reinstated. Rendering around every bracket without a plan can leave awkward unfinished areas.
See housing and planning information for Nottingham and nearby places, including the source and geography behind each figure.